In short, Office 365 is a popular cloud-based solution for both small and big businesses. It provides a variety of services and has a simple interface, making it accessible to anyone. Backup Office 365 emails are required for several reasons, which we shall explain in this post. Before that, discuss its productivity programs, which include Skype, Outlook, Microsoft Word, Team, and many others.
Aside from that, it provides excellent protection for the user’s critical data. The fact that Office 365 is a cloud-based service means that there is no downtime for users. As a result, it is always up-to-date and does not interfere with the user’s workflow. Organizations want trustworthy technology that makes it easier to back up Office 365 emails. As a result, study this article until the end; we will go over all of the options for doing this backup process.
There Are Several Reasons Why Clients Want to Backup Business Data.
- Backup Office 365 emails and other data to local storage, which makes it easier to transfer to another PC.
- When consumers wish to protect their data from potential catastrophes, backup is the ideal solution.
- Office 365 offers limited storage capacity to customers who do not wish to pay for more space. Backup Office 365 emails to save up space in users’ mailboxes.
- Furthermore, there can be additional reasons to run the Office 365 email backup action, which can vary depending on the user.
DIY Methods for Backuping Microsoft 365 Emails
E-Discovery is Microsoft’s manual way of backing up Office 365 emails to local storage. However, before using this approach to do this backup operation, users must check the system requirements. Now we’ll go over the manual way, which includes step-by-step instructions for completing this backup process.
Read this Blog: How to Disunit PST Emails Into Small Parts without Losing Data?
Step-by-step instructions for utilizing the e-discovery approach to accomplish Office 365 email backup activities.
- Preferably, log into your Office 365. To end this action, go to the Microsoft admin hub.
- Behind you’ve successfully accessed the admin center, click on safety.
- After that, guide to the licenses, email, and partnership roles, and pick the eDiscovery Manager Role level.
- The edit choice permits you to add your account to the eDiscovery administrator list.
Notice: If the export role is skipping in some cases, you can add it by choosing the Edit role control.
- After that, log in to the Microsoft Purview compliance portal, select the content search option, and then click the new search icon. The new search option is occasionally absent because the eDiscovery rights you enabled in the previous step require 24 hours or less to take effect. However, it cannot always take effect right away.
- After obtaining eDiscovery access, enter a specific field name into the search and go to locations. Then, pick the data you wish to back up.
- The following wizard box provides an option for number filtering that is present on the conditions page. If you wish to back up all of the data, you can disregard the conditions.
- After that, click submit to close the wizard. Now begin your search.
- You can verify your search task by selecting the search tab.
- After finishing your search, click on the action choices and pick Export Results.
Limitations of the eDiscovery Approach For Backing up Office 365 Mailboxes
- Manual techniques are tough for untrained and non-technical individuals. Backup Office 365 emails manually only if you are highly technical. Users should use caution when carrying out this backup method, as a single human error might result in data loss.
- It has a significant risk of data duplication and is a lengthy procedure. The manual technique does not provide any additional features to make it easier for companies.
- As a result, using a professional Office 365 backup solution is the simplest and most effective approach to begin this process.
Now we’ll look at the professional software that Mailvita provides to make this work easier.
Mailvita Office365 Backup for Mac Can Backup Microsoft 365 Emails
The Mailvita Office 365 Backup Software for Mac has a straightforward interface that makes it easy for beginner users to do this backup. Also, users will find a step-by-step tutorial for doing the backup process on the official website.
But first, let’s look at some of the sophisticated capabilities of this professional application.
- It helps different file types for backing up Office 365 emails, including MBOX, PST, EML, and MSG.
- This program correctly backs up Office 365’s user mail, public folders, and archive mailboxes.
- Also, it can take multiple backup processes without slowing down the operation.
- Users can also read more items before starting the backup of Microsoft 365 emails and other data.
- Before running this backup process, it shows a filter choice that permits users to have or delete the selected things.
- Large objects might be time-consuming. As a result, it allows you to select the time for huge objects. Users can adjust the timer from 2 to 30 minutes.
- This tool’s incremental backup option allows users to restart the backup Office 365 email operation from where it left off. It also avoids the possibility of data duplication.
- Apart from that, this program is also capable of conducting restoration tasks.
- The fast search function provided by this Office 365 backup solution makes it easier to discover needed objects quickly.
- A review copy of this product is accessible on Mailvita’s official website so that users can test the product’s compatibility.
Step-by-step operation of the Mailvita Office 365 Backup and Restore Tool
- Download and run the Mailvita professional program from the official Mailvita website. Then, start the software on your laptop.
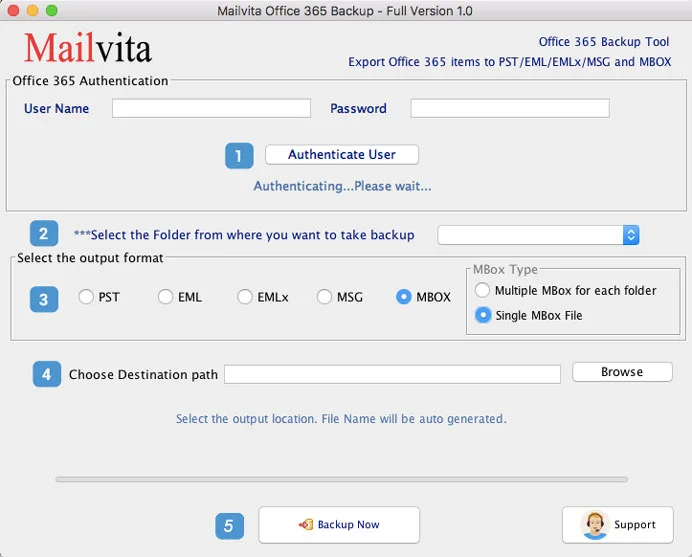
- After that, select the Connect Office 365 option. When logging in, pick contemporary authentication, then fill out all of the relevant information and click OK.
- After that, double-check the list of additional mailboxes.
- To create a backup job, first, go to the ribbon bar, then pick backup jobs, and lastly hit the add icon. After that, pick one from the archive mailbox, public folders, or primary mailbox, and click OK.
- Now, utilize its filtering feature to include or omit objects. Furthermore, users can filter data by date or folder and choose between the two. After that, select the option “already exported in all folders”; this only exports mailboxes that were not previously exported.
- Then, in the scheduler, click on the job schedule option; if you want to conduct this task manually, select run job manually.
- And, to perform the task right away after establishing the backup job, pick the Start Instantly option. To schedule a job, use the Job Schedule option.
- If you choose the job schedule option in the previous stage, a new display will appear in which you can select the desired settings. To run a job daily, pick daily; to run it weekly, select weekly; and so on. Click OK once you’ve input all of the essential information.
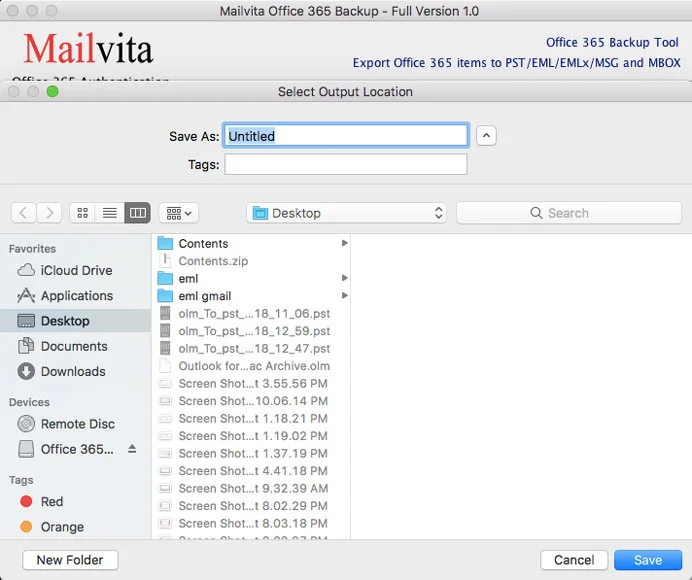
- Next, navigate to the task directory and add the destination location where you wish to back up your Office 365 emails. Then, choose the file type you wish to use to back up your Office 365 emails, such as PST, MSG, EML, or MBOX. Finally, provide the job name and click Create Backup Job. Following that, the backup procedure for Office 365 emails will begin.
Conclusion Verdicts,
Behind this writing, we suggest operating Mailvita skilled software to back up Office 365 emails. Likewise, the rates displayed above are overly fast and work with excellent accuracy. Again, pros choose third-party software for this backup method. Before creating a choice, think about the parts and benefits shown by the Mailvita Office 365 Backup For Mac. Also, check out the complimentary trial version available on Mailvita’s official website.